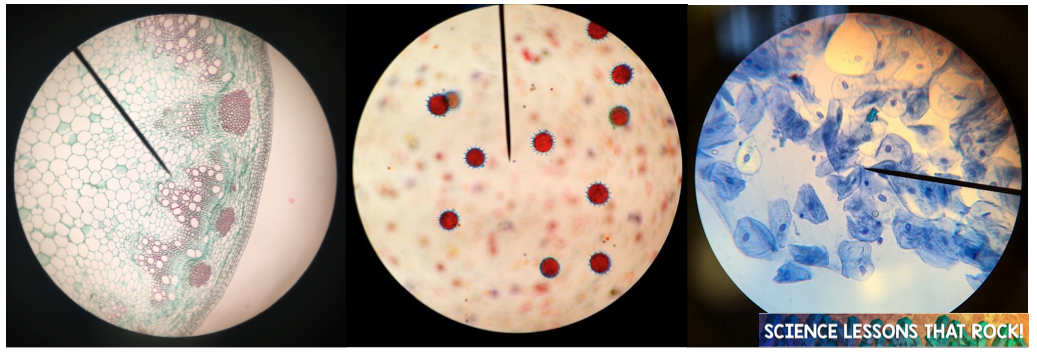
Getting out the microscopes is one of the best parts of teaching biology. I love hearing the ooh’s and aah’s when they finally get the specimen into focus. But if you’ve taught biology before you know it can also be one of the most exhausting units- constantly running around the room because “Mrs, I just don’t see anything!” or they end up drawing dust, air bubbles, or their eyelashes. After a decade of tweaking my microscope unit, I’ve come up with some tips to help save your sanity.
Tip 1: Don’t get them out until it makes sense.
While it may be tempting to get microscopes out the first week of school, it just doesn’t make sense. If you aren’t going to use them regularly until later in the year, why are you teaching them the names of the microscope parts in week 1? They will forget the information and you will find yourself reteaching. Hold off until you get to cells (or whichever unit you need them regularly).
That being said… I encourage you to use them after your cells unit. It shouldn’t be one and done! Check out this blog post for some ideas on how else you can use them!
Tip 2: Make sure students know the names of the microscope parts.
It can be really frustrating when you are trying to help a student, tell them to adjust the fine focus, and they look at you like you are speaking another language. Because of this I don’t let students start using the microscope until they can tell me the names of all the parts. We take notes on it and I give them a short quiz at the beginning of the unit. If you want to check out the worksheets I use for teaching parts of the microscope, you can find them on my website or on TpT.

Tip 3: Try a virtual lab first.
Virtual labs are a way to provide students extra practice on the methods of using a microscope before getting out the real deal. Extra practice never hurts, especially for your SPED or ELL students who would really benefit from some visual practice. Here is a great option.
Tip 4: If your scopes have a singular ocular, teach students how to determine their dominant eye.
The microscopes in my room have a single ocular lens, so students often ask me which eye to use. This video shows an easy and quick way to teach them which of their eyes is dominant.
Tip 5: Start with prepared slides.
I always begin with prepared slides. I put 4 different prepared slides at each lab group, and have students practice focusing and drawing. The first day of prepared slides you will hear a lot of “I don’t see anything!” but eventually they get the hang of it. Not all of your students are going to be great artists, but I make sure they know when they turn in their drawings they must a) be drawn to scale, and b) be neat. No scribbles allowed. I should be able to look at the drawing and easily tell what slide it is. I created lab templates that I use for prepared slides, that you can find on my website or on TpT.
Don’t have access to prepared slides? You can make your own! Check out this blog post on how to easily make a classroom set.

Tip 6: Encourage peer help

There is only 1 of you and 30 students. It is physically impossible for you to be running around helping every single student. One day when I was about to rip my hair out I made this poster and hung it up on the whiteboard. Students were not able to call me over for help unless they had checked all of these items off the list. Most of the time their neighbor can help them resolve the issue before you need to be called over. If they still needed help after going down the checklist, then they could call me over. It has helped greatly! You can download this for free in my TpT store here.
Tip 7: After students have mastered prepared slides, then move on to wet mounts.
Wet mounts can be much more exciting than prepared slides because you can have students look at their own cells (if your school allows you to do a cheek cell swab) or watch microorganisms swimming around. Protists are an absolute blast to watch, but students need to have mastered focusing the microscope and scanning relatively quickly in order to see the protozoa zooming around. You don’t have to spend money ordering protists from a supply company, you can easily get your own culture going. Check out this blog post on how to set up a hay infusion. During this lab, I allow students to take pictures or videos with their phones. It takes a steady hand, but they can line up their smart phones with the ocular and get a decent video.
Tip 8: Teach students clean-up expectations

It can be really frustrating when the bell is about to ring and students try to walk out of the classroom without cleaning up. General microscope clean up procedures should include:
a) Removing your slide and returning it to where the teacher directs
b) Turn the objective to low power
c) Turning off the light
d) Putting the dust cover back on
e) If you are putting microscopes away for the day, unplugging and winding the cord around the arm.
I have this poster hanging on my microscope cabinet- it is a freebie from my friend Bethany Lau. You can find it in her TpT store.
Don’t have a class set of microscopes? Check out some alternative options.
I hope these tips help your microscope unit run more smoothly! Have fun!


