I love teaching weathering and erosion! One of the best ways to learn about weathering and erosion is to SEE it in action. There are a few ways to do this:
- Have students go on a hunt outside and look for evidence of weathering or erosion. Have them take a picture, predict what caused the weathering or erosion, and upload to your LMS. (This is a great homework assignment if you don’t want to do it around campus).
- Have them explore cool landforms around the world that have been formed by weathering or erosion on Google maps. (If you want a premade lesson on this, check out this interactive diagram on TpT or on my website).
- Have them play with stream tables!
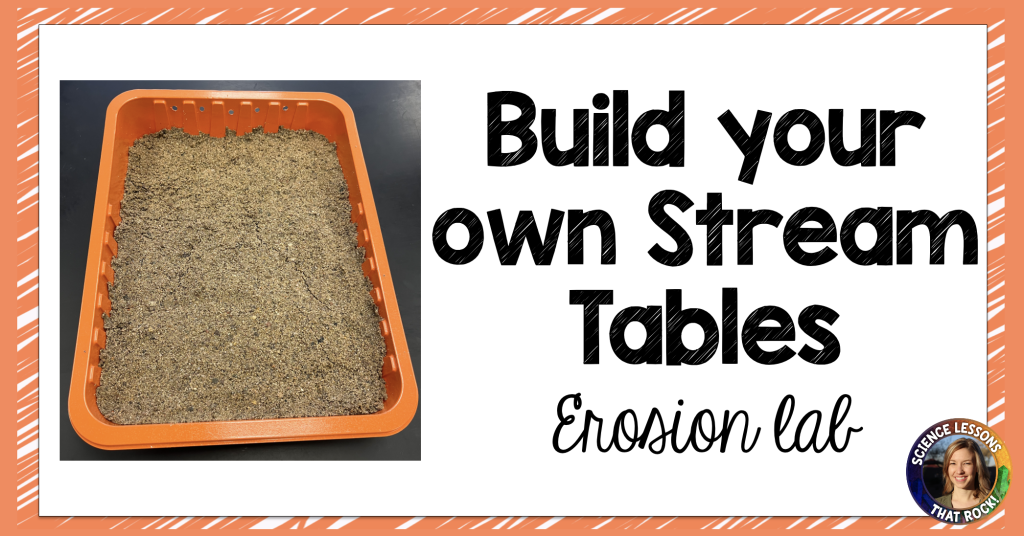
Large stream tables are expensive, and a pain to store from year to year. You can easily make your own (for a lot less money!) by using small paint roller pans. I’ve done this lab multiple times over the years and worked out the kinks for you. Here are my best tips!
How to build your own stream table
(If you are more of a video kinda person and would like to SEE this lab instead of read about it, check out this youtube tutorial instead).
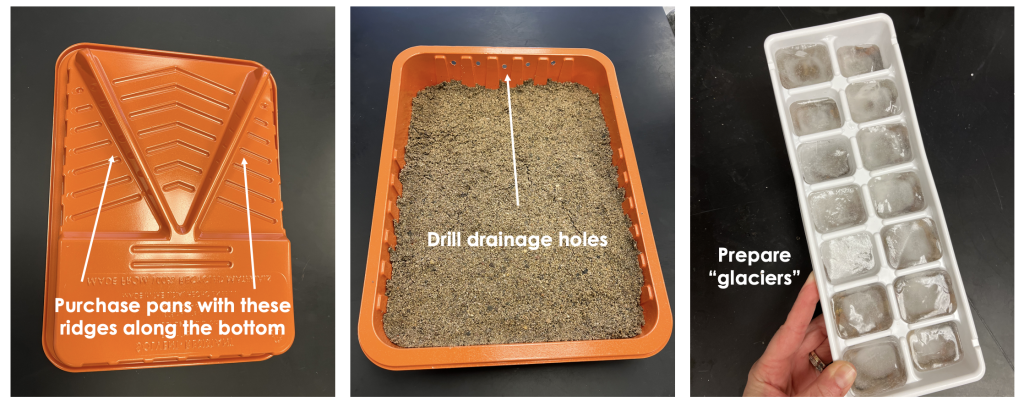
First, you’re going to need to head to Lowes or Home Depot. You have a few options when purchasing paint roller pans: there are metal and plastic. You’re going to want to purchase plastic paint roller pans that stand up at an angle themselves, not the really flexible insert pans. You can see in the picture below, the bottom has raised ridges that help it sit at an angle. They cost roughly $2 each, so I spent $16 on 8 of them (don’t worry, they will last you multiple years).
Next, you need to drill holes along the bottom of the tray for drainage. I drilled 5 per tray, and that was more than adequate. If you don’t want lakes to form at the bottom of the tray, drill the holes towards the bottom. If you are fine with water pooling, drill them about halfway up the pan.
The last step is to fill them with sand. If you have sand around your campus or neighborhood you can use for free, have at it! You can also purchase sand at Home Depot for about $5 a bag. One bag was enough for me to fill all 8 trays.
The day before the lab, you will need to also prep 2 more things:
- Get one plastic cup per group. Drill or poke a hole in the bottom of the cup. Students will be filling these with water and allowing the water to drain out onto their mini stream table.
- Get an ice cube tray or two, fill the bottom with some small gravel, and top off with water. Freeze overnight. These will be used to represent glaciers.
Stream table experiment TIPS
These stream tables are obviously much shorter than the typical ones you can order from science suppliers. That limits the amount of erosion that can take place. Here are some tips to help them work the best:
- Start with wet sand, and pack it down tight. If the sand is dry, it will all run down without creating a clear channel. It also helps to form a small, narrow channel with your hand before running any water down. Since the tables are so short, this helps the stream form faster.
- I’ve done this lab both indoors (when I had a lab space with lots of sinks and rubber hoses) and outside (when I had no sinks). I definitely recommend doing this outdoors to avoid messes and sand going down your drains. You will need a couple 5 gallon buckets- just fill them up and place outside. Multiple groups can share water from 1 bucket.
- Alright, lets talk water. If you simply pour water from a cup or beaker, the water tends to spread out too fast and channels don’t form. Solution: poke a hole in the bottom of a plastic cup. Have students cover the hole with their finger while they fill the cup, and then uncover the hole once they are ready for water to flow down the pan. A smaller, more direct water source helps the channel form more easily.
- Between trials, students need to dump out any excess water, flatten out the dirt, and re-form that shallow channel.
- In the past I’ve tried to have students blow through straws and see wind erosion, but it doesn’t work well with wet sand. If you would like to try this, I would have one tray that has very dry sand, and have groups rotate over to it.
Stream Table Variables
What can you have students test? What variables impact the rate of erosion?
- You can change the slope of the pan by holding it up at a steeper angle.
- You can have students change the water discharge by providing a second cup with a larger hole.
- You can have students place rocks or small plants down into the sand and see what impact it has on erosion. Does the water go around the rocks? Over the rocks?
- Have students gently push an ice cube glacier down the table. Does any sand below the glacier erode? What happens to the bottom of the ice cube by the time it reaches the bottom of the tray?
- Have students start their channel with meanders instead of a straight channel. Do meanders make the river erode faster or slower? On what part of the curve is erosion taking place?
While overall this is a very qualitative lab and there isn’t much data to record, it is fun for students to get outside and visualize stream formation. You can find a lab write-up on TpT or on my website.
Rock on,