In this lab, students will be testing whether or not aquatic plants do photosynthesis in the dark or light, and also testing if they do cellular respiration during the dark or light. The plant I usually use for this experiment is called elodea, which is available at any local pet store in the fish area. One nugget of information you will need to know- pet stores call it anacharis, not elodea. It is usually sold in bunches of 4-5 stems for a few bucks. Two big bunches should get you through the day. If they don’t have elodea, any other aquatic fish tank plant will work fine, but make sure it is a tall skinny plant that will fit down into your test tubes.
One reason this lab is great is because it can be used in multiple places in your curriculum:
~ Cells unit: When you are teaching cells, chances are you will be talking about chloroplasts and mitochondria. Along with these organelles you will be discussing photosynthesis and cellular respiration. This lab fits in great because it shows that plants not only do photosynthesis, but cellular respiration as well.
~ Ecology unit: During my ecology unit, we cover the 3 major biogeochemical cycles (water, carbon, and nitrogen). What better way to talk about the carbon cycle than to demonstrate the relationship between plants, animals, and gas exchange?
A little background….
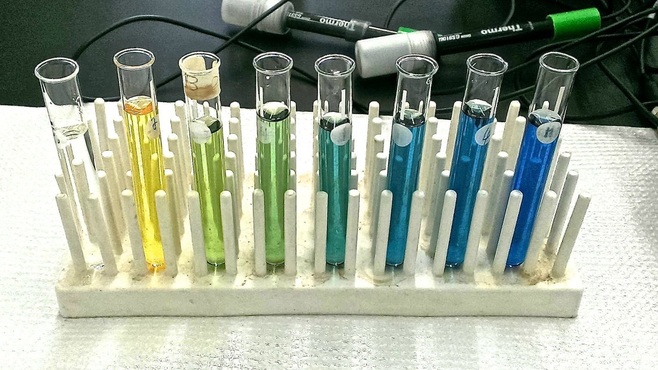
This lab uses the chemical bromothymol blue. This chemical is used as a pH indicator. When the pH is above a 7 (basic) it is blue, but when the pH drops below 7 (acidic) it starts to turn yellow.
Image below is courtesy PureySmart on Wikimedia Commons.
Inquiry, Inquiry, Inquiry
When I do this lab, I do not tell students how to set up the experiment. I split the class into lab groups, and assign each group one of the following questions:
1. Do plants to photosynthesis in the dark?
2. Do plants do photosynthesis in the light?
3. Do plants do cellular respiration in the dark?
4. Do plants do cellular respiration in the light?
Obviously the group that gets assigned “do plants do photosynthesis in the light” will know the answer, but they will still have to set up a controlled experiment that can demonstrate it. I give each group a big white board and have them set it up like the image below. They will have to fill it out based on the specific question they are assigned. If you don’t have whiteboards, butcher paper works great too. Students will know what materials they have to work with because they are listed on their lab worksheet (available in my TpT store).
Two notes: I get asked how much bromothymol blue to add to the test tubes. I have each group add 1mL to each tube. If you would like to add more or less that is fine, as they add the same amount to each test tube for consistency. Also- make sure to fill the test tubes to the top and cap them tightly, or use parafilm to cover the tops. We want the gas to stay in the water, not escape.
Results!
When students come in the following day they will pick up their test tube rack and fill out their data tables on what happened. They will see that the elodea did photosynthesis in the light, and cellular respiration in the dark.** (see note below)
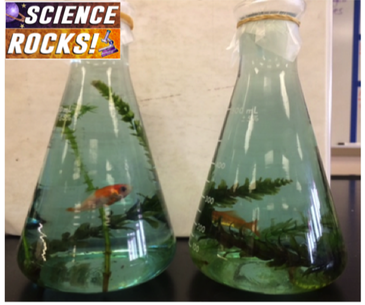
A great extension activity is to add aquatic animals to this experiment and see how the added respiration affects the color change. If you can get your hands on some small snails, they will fit great into the test tubes. I had trouble finding snails in Arizona, so I went to my local pet store and picked up two feeder goldfish. I filled up two large Erlenmeyer flasks with water and bromothymol blue, and turned one yellow. I added elodea and a goldfish to each flask. Next, I asked my students what will happen when we leave these in the light for 24 hours. The next day we came in and saw both flasks were a shade of bluish green (somewhere in the middle of where the two flasks began). If you don’t add a ton of bromothymol blue, and only leave the fish in for 24 hours the fish will not be harmed.
Hopefully you are ready to start this experiment! If you have any questions, drop them in the comments below!
(PS- Looking for other respiration or photosynthesis ideas? Head to these blog posts!)


