Get tips, resources, and ideas sent to your inbox! ➔

10 Resources for Teaching Cell Membranes

Cell-Membrane-Sandwich-Analogy

One of my favorite parts of the cell unit is teaching about membranes. If you ask me, they are by far the most important part of the cell. Everything the cell does is because it is responding to signals received by the membrane. While many students think the nucleus is in charge, it is in fact the membrane that is directing cell processes. (You can read a blog post about why the cell membrane is more of the control center than the nucleus by clicking HERE). 

There are a ton of lab options you can do for students to understand the structure and properties of the cell membrane. Check out these 10 resources you can implement in your classroom: 

MEMBRANE PROPERTIES & STRUCTURE
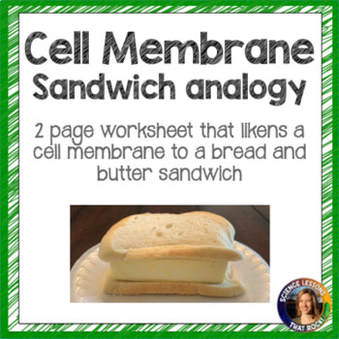
1. Visualizing the Membrane: Using analogies really helps students visualize the cell membrane in their head. I read this analogy a few years ago in a book by Dr. Bruce Lipton and have been using it ever since. I tell the students the cell membrane is like a bread and butter sandwich. If I poured water on top of the sandwich, what would happen? Students can recognize that the water would only soak through the bread and stop at the butter layer. Since students already learned about lipids being hydrophobic from our macromolecule unit we circle back to that discussion. Click here if you would like to check out a worksheet that goes with this analogy.


cell-membrane-bubble-lab

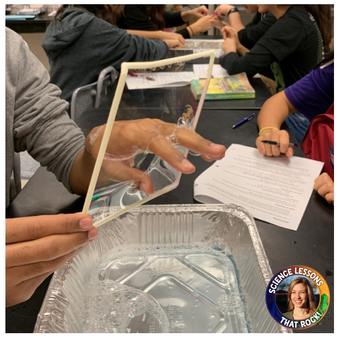
2. Bubble Lab: Who doesn’t love to play with bubbles?! Bubbles are a fun way to examine properties of membranes because they are similarly made of molecules that have a hydrophobic side and a hydrophilic side. In this lab students learn how membranes are flexible, can self repair, how materials move in and out, and more. Materials are inexpensive and the fun is endless. You can find it FREE HERE.


3. Interactive Website: Check out this interactive from PBS where students click and learn how molecules pass through the cell membrane.

carrot-osmosis-lab

MEMBRANE TRANSPORT (Many of these labs demonstrate the same concepts. Pick one or two that you like!)

4. Carrot lab: This lab is great for middle school students to understand osmosis. In this activity, students will soak a baby carrot in fresh water and salt water overnight and observe any changes to it’s physical appearance and mass. (You can use celery, potatoes, or any other vegetables you have on hand). I prefer using vegetables over gummy bears (Which is a teacher favorite) because vegetables are actually made out of cells.


5. Egg Lab: In this classic lab, students dissolve an egg shell with vinegar and are able to observe a “naked” egg. Once the shell is dissolved you can soak the eggs in different liquids such as distilled water or corn syrup and observe the effects on the egg size and mass. This lab is fun, but I don’t do it every year because there are always messy casualties. You can read more specific directions HERE.

dialysis-tubing-lab

6. Dialysis tube lab: In this ADI lab, students need to design an experiment to determine the effect of solute concentration on the rate of osmosis. (Note: ADI labs are available for free online, but the hard copy books must be purchased if you want the answer key). This is a great lab for high school students who are ready to think critically and design their own experiment. Sugar can also be used instead of salt. When I had students complete this experiment I pre-mixed the solute concentrations and we discussed how dialysis tubing works but had students figure out their own experimental set up. Dialysis tubing can be purchased from science suppliers or is also available on Amazon.


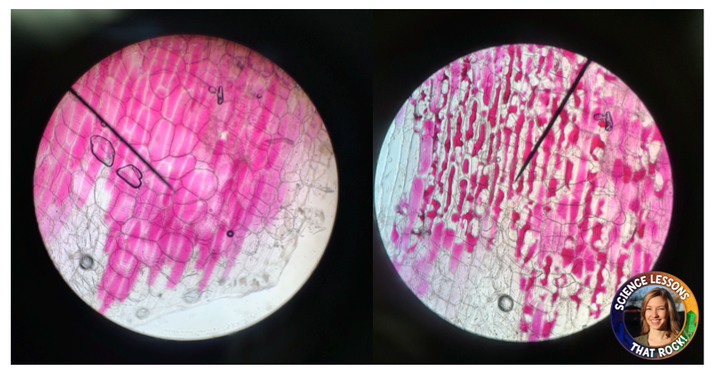
7. Onion Skin Lab: Have you already taught students how to use microscopes? If so, this lab is fool-proof. In this lab, students observe a thin layer of purple onion under the microscope. They make wet mounts with fresh water and salt water, and observe what happens to cells placed in a hypertonic environment. You can read a blog post with some tips HERE. It’s great because it’s easy (no dye needed) and really inexpensive.

Osmosis-Tonicy-worksheet

8. Osmosis Tonicity Worksheet: I created this quick 2 page worksheet to use as a formative assessment before I tested students on osmosis. It includes a handful of scenarios and students have to identify how the cells will respond and if the solution is hypertonic, hypotonic, or isotonic. You can download it here.


9. Amoeba sisters: Do you want to enrich your lesson with some videos? Amoeba sisters videos on youtube are great for review and reinforcement. There are two video clips that cover topics relating to the cell membrane, one titled “Inside the cell membrane” and another titled “Cell Transport.”
Don’t forget that many of the amoeba sisters videos have worksheets to accompany the lesson. They can be found here.

cell-membrane-close-reading-article

MEMBRANE FUNCTION
10. Cell membrane close reading: One thing students tend to struggle with is understanding how the cell receives and responds to signals. When we use the term “environment” students think about the outdoors… but the environment for a cell is the conditions inside our bodies. I wrote this close reading article to help students understand how the cell receives and responds to signals, and how genes can be turned on and off. It is a great segue into genetics because it introduces the topic of epigenetics.

I hope you have a great cells unit and your students have a blast with some of these labs!


Share it:

Email
Facebook
Pinterest
Twitter

Hi, I'm Becca!

I help busy science teachers get your prep back by providing you time saving lessons, labs, and resources.

Search the Site

Search

Browse by Category

Get Freebies!

Let me help your students with experimental design! Sign up to receive a free glow stick lab sent to your inbox!