- Students spend more time socializing than working.
- One or two students do the majority of the work.
- By the end of the project the quality of work turned in is not up to par.
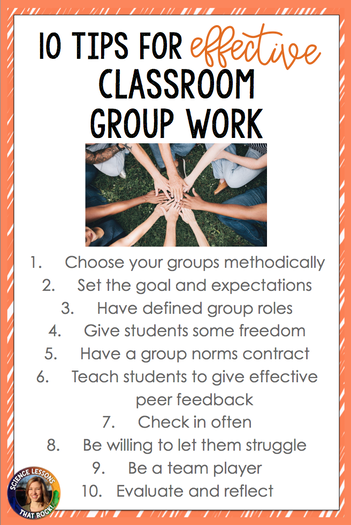
After teaching a PBL course for a few years that uses group work almost exclusively, I’ve had to learn how to monitor groups effectively. Here is my list of top 10 tips to keep your group work running smoothly:
1. CHOOSE YOUR GROUPS METHODICALLY.
Although students always beg to choose their own groups, 9 times out of 10 I choose them beforehand. The size of the group and the way I choose student groupings depends on the assignment. One way to help figure out group sizes is to map out the project tasks and estimate the work load. I tend to prefer groups of 3-4, but for some projects you might choose pairs or large groups. After I’ve figured out how many students I want in each group, I think about strengths and weaknesses of students and group them accordingly. For example, if the project is a formal debate, I make sure each team has a few strong speakers, some students that are good at researching, and others that are strong writers. Throughout the year as students get used to their classmates and working in groups will begin to step out of their comfort zones, but in the beginning it is really important you play to their strengths to help them feel like they are set up to succeed.
2. USE MODELS AND RUBRICS TO SET THE PROJECT EXPECTATIONS AND GOALS
It is the worst when you have spent 3 weeks on a project, students turn in or present their work, and the quality is nowhere near what you were expecting. To help avoid this, make the project expectations clear to students by passing out and reviewing the rubric, and showing them samples or models. One counter argument I always hear is “but if I show them a model, they just copy it.” If your project is set up to be engaging and encourages creativity, students won’t copy the sample.
The sample you show them doesn’t have to be a model of exemplary work… in fact it’s almost better if it’s not. That way you can have students analyze the strengths and weaknesses of the model and find ways to make improvements for their own project. Have them review the final grading rubric, allow them to ask any clarifying questions, and grade the sample. It will help them realize what an “A” project should look like.
3. HAVE CLEARLY DEFINED STUDENT ROLES
In order to avoid some students in the group working a lot harder than others, have defined job roles for the project along with formative checkpoints to make sure they are progressing. For example, for a forensic crime scene project, group roles could include: evidence collector, crime scene photographer, forensic science specialist, and reporter. Naturally, not every group role will have the exact same amount of work, so they need to learn how to help each other (more on this with tip #9).
4. GIVE STUDENTS SOME FREEDOM OF CHOICE
One way to get student buy in is by letting them have some freedom to make decisions in the project. In PBL, this is called student voice and choice. You can allow students to choose which roles they want, who their audience should be, their mode of presentation (powerpoint vs brochure or poster etc). If you are worried about them having too much freedom, you can require teacher approval of whatever they decide before moving on. Overall, you will have a lot more buy-in from students when they have had an opportunity to make group decisions.
5. HAVE A GROUP NORMS CONTRACT
Even when you teach older grades, you will still have students whining “but (enter student name) just sits on her phone” or “(enter student name) never has his part ready on time.” Students need to learn how to self monitor and not run to the teacher with complaints. At the beginning of the project, have the group create a norms sheet that they all agree to and sign off on. If any students are breaking the norms during the project, they should be able to more effectively monitor themselves when they have a signed document to refer back to. They can say things like “Remember when we all agreed to have our work completed on time?”
6. TEACH STUDENTS TO GIVE EFFECTIVE PEER FEEDBACK
Throughout the project, you need to have students give each other peer feedback. This will take a lot of the work load and grading off your shoulders and you will end up with higher quality work. Depending on the project, you can a) choose to have students give feedback to others within their own group, or b) have them critique the work of other groups (this only works well when groups aren’t competing with each other or trying to come up with really original ideas).
Some ways you can have students give each other feedback are:
- A gallery walk where students leave anonymous comments on sticky notes
- Each student uses a different colored highlighter when critiquing writing assignments
- Have students sit in a circle, present their progress, and give each other verbal feedback
- Use sentence frames such as “I wonder if you considered….”
If you’d like some more tips on peer feedback, check out this blog post.
7. CHECK IN WITH GROUPS OFTEN, REDIRECT, AND REMIND THEM OF THE END GOAL.
If your goal of assigning a group project is for you to have a little R&R at your desk, you have the wrong idea. You need to be constantly monitoring groups, checking in, and giving guidance. Students have a tendency to have side conversations about prom, check their phones, discuss their work schedule…. you know the drill. When you are walking around monitoring progress it will help nip these behaviors in the bud.
Also, sometimes students have been working hard and won’t seek you out for help, but when you sit down with the group you realize they really need some redirection and suggestions. When this happens, take out the grading rubric, remind them of the final goal, and help align what they have done with the project expectations.
8. BE WILLING TO STEP BACK AND LET STUDENTS STRUGGLE
Now, I know I just told you to redirect groups and give suggestions when needed, but this does NOT mean tell them how to complete the assignment or do any hand holding. It is 100% okay to let them struggle! Part of their growth and learning process is to struggle along the way, brainstorm solutions to any problems that arise, and learn to overcome hurdles. Some of the best projects were ones that my students whined about the most. For example, I had students create animated videos on scratch.mit.edu, an introductory coding site. Partners were assigned a cell process (such as photosynthesis or DNA replication) and had to show me an animated version of that process by making a video. Let me tell you…. they whined and cried for 2 weeks about how hard it was. The struggle was real. But by the end, they had some awesome videos to show me that they were really proud of.
9. WHEN YOUR PART IS DONE, YOU AREN’T DONE. BE A TEAM PLAYER.
When you are nearing the end of the assignment, you might catch some students sitting back with their feet up. When I would ask “why aren’t you working with your group?” I would often get the response “because my part is done.”
We had many classroom conversations about how nobody is done until the entire group assignment is completed. There is ALWAYS work to be done. Sometimes it is helpful to give students a checklist of things they can do when their part is completed. It could include:
- Going back and editing
- Offering help to a team member who isn’t completed with their portion
- Reviewing the grading rubric to make sure they have met all the expectations
- Adding any extra touches (such as animated graphics to a powerpoint)
10. EVALUATE AND REFLECT
I always allow students to peer evaluate their group members at the end of a group assignment. It’s not fair for everyone to receive the same grade if they didn’t do equal amounts of work. Give students a grading rubric (it can be simple: rate your peer on a 1-5 scale on these 3 criteria) and have them rate their group members. I always tell them to be completely honest- no one will see the papers but me.
Once the group project is over, I also think it is valuable to have a classroom discussion on what went well and what didn’t go well. How can we work better next time? Where did we fall short? Where did we exceed expectations? (These conversations are really valuable for you as the teacher so you can learn what to modify and tweak for the following school year). When students worked exceptionally hard, I would always try and have some sort of reward. It can be as simple as buying a box of otter pops or having a movie day (ideally related to the project), but allowing students to have a break at the end of a project giving them a brain break is always appreciated.
I hope you found some of these tips helpful and try a group project or two this year!


