While they aren’t ideal for every activity, here are some times you can bring them out:
1. When Introducing a New Topic
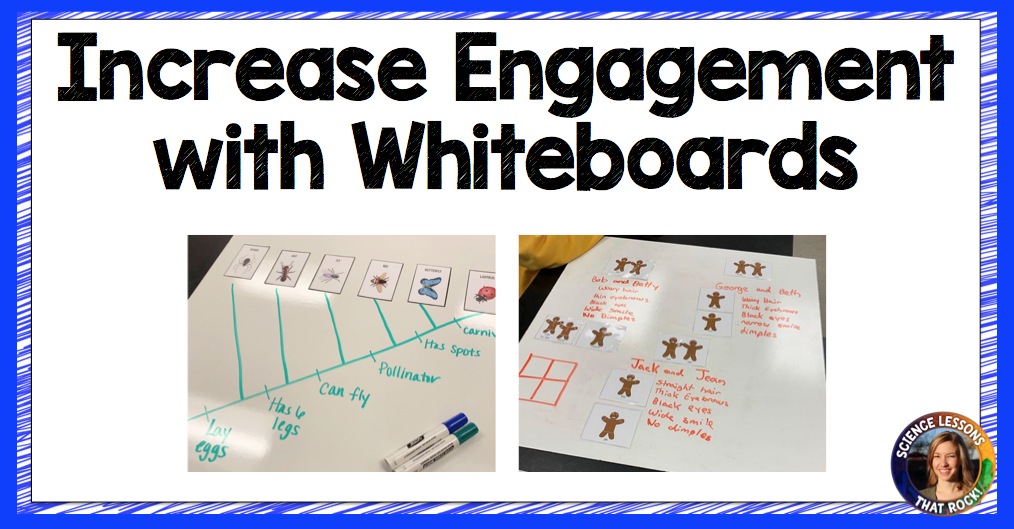
I love getting out whiteboards when we are learning a new topic and students need the ability to mess up, erase, try again, and master a new skill. If you teach biology like I do, pedigree charts, punnett squares, or mapping out dichotomous keys are great examples of times students need to erase and try again. (Tip: instead of wasting paper towels, bring in old rags or socks and use them as erasers instead).
2. Experimental Design
Doing a lab where students need to design an experiment? Having lab groups whiteboard out their experimental set up really helps them talk through the process before beginning (see image below for a 5 second rule bacteria lab). I usually make lab groups call me over and get teacher approval before grabbing their supplies. I’ll ask them to explain their set up to me, clarify their variables, and make sure their experiment is controlled before beginning. If you use CER (claim, evidence, and reasoning) at the end of your labs, whiteboards are another place they can map out their findings.
3. Giving Peer Feedback
One of the first official whiteboard PD’s I took was based on modeling instruction which relies heavily on whiteboard use. Without going into a bunch of detail, students use whiteboards to draw models of science concepts. Once drawings are complete, the class holds a whiteboard session where we would stand up and face each other in a large circle, and give feedback on other groups’ whiteboard data. This could also be applied to ADI’s argumentation sessions. It takes a few times for students to get the hang of asking appropriate questions and giving helpful feedback, but once they get the hang of it you as the teacher can step back and let students discuss their learning without much guidance (which is pretty amazing to watch).
4. Showing Progression of Learning
Do you ever have students write things down that you want to refer back to throughout the unit? For example: do you ever have students brainstorm what they already know about a topic to identify misconceptions? If you are trying out project based learning, do you have your students write out their need-to-knows and update them throughout the project? Sometimes I have students write things down that I don’t want erased for a few weeks. If you have enough whiteboards to get you through all your classes, allow students to turn in their whiteboards without erasing them, prop them up in the front of the room or window sill, and refer back to them when needed.
5. Formative Assessment
If you finished a concept and want a quick way to visually assess where students are at before moving on, whiteboards are a great tool for formative assessment. Put a practice problem on the board, have them whiteboard the answer, and hold it up for a quick visual check.

|

|
Once you get the whiteboards back to your classroom, there is one magic step you don’t want to miss to keep them looking white and shiny for years to come: car wax. Before you hand them over to your students, grab an old rag and some turtle wax and give them a nice coating. This will keep your whiteboards erasing well. I do this about once a year and my 10 year old whiteboards still look practically brand new.
Don’t have the budget for whiteboards? Or are you interested in some other options? Here are a few other options I’ve tried you might be interested in:

|
I came across these mini paddle whiteboards at the dollar store and bought a dozen of them to try.
PROS:
CONS:
Another option is to buy chalk markers and have students write directly on your lab tables.
CONS:
|